Thursday, August 31, 2023

Sitecore PowerShell Extensions: Creating Sitecore users in bulk using SPE

Sitecore PowerShell Extensions: Creating Sitecore users in bulk using SPE

This blog is intended to demo on how to create multiple users and assign them the required roles through automation by the use of Sitecore PowerShell Extensions. If there is a requirement to create multiple users in Sitecore and assign them individual Roles, it can take a while to do it manually one by one. Instead, we can configure the user creation and role assignment using a script in Sitecore PowerShell Extensions. 


Here is an example which explains how multiple users have been created into Sitecore. Reference to the Sitecore documentation : https://doc.sitecorepowershell.com/appendix/security/new-user

New-User -Identity usrA -Enabled -Password b -Email usrA@gmail.com -FullName "User A"
New-User -Identity usrB -Enabled -Password b -Email usrB@gmail.com -FullName "User B"
New-User -Identity usrC -Enabled -Password b -Email usrC@gmail.com -FullName "User C"

Once these users are created, the below step is to add the users into their respective roles. Below is the command to add the individual users into the Roles. 

Add-RoleMember -Identity "Developer" -Members "usrA", "usrC"
Add-RoleMember -Identity "Publisher" -Members "usrB"

Reference to the Sitecore documentation : https://doc.sitecorepowershell.com/appendix/security/new-userhttps://doc.sitecorepowershell.com/appendix/security/add-rolemember

Hope this article helps to create users in bulk and can save lot of manual efforts. 


Monday, August 7, 2023

Allowing PDF file redirects on the Sitecore website

Allowing PDF file redirects on the Sitecore website

As per the Standard Sitecore setup, the PDF redirects are not allowed or handled via Sitecore. This blog is intended to demo the use case to allow redirects of PDF files.

In order to give the freedom to Content Authors, so that they can setup these PDF redirects, the PDF extension is required to be allowed in the below processor FilterUrlFilesAndExtensions

Below is the configuration required for a SXA website:

<sitecore>
  <pipelines>
    <preprocessRequest>
      <processor type="Sitecore.XA.Foundation.SitecoreExtensions.Pipelines.PreprocessRequest.FilterUrlFilesAndExtensions, Sitecore.XA.Foundation.SitecoreExtensions">
        <param desc="Allowed extensions (comma separated)">aspx, ashx, asmx, pdf</param>
      </processor>
    </preprocessRequest>
  </pipelines>
</sitecore>


After making the above change, the URL https://sc102.dev.local/dummypage/dummy.pdf gets redirected successfully to https://sc102.dev.local/home

Below is the configuration required for a normal Sitecore website without SXA module:

<sitecore>
<pipelines>
<preprocessRequest>
<processor type="Sitecore.Pipelines.PreprocessRequest.FilterUrlExtensions, Sitecore.Kernel">
<param desc="Allowed extensions (comma separated)">aspx, ashx, asmx, pdf</param>
</processor>
</preprocessRequest>
</pipelines>

Sunday, August 6, 2023

Issue with Sitecore CleanUpAgent resulting in low disk space on Sitecore servers

Issue with Sitecore CleanupAgent resulting in low disk space on Sitecore servers

This blog is intended to demo the resolution of the issue with Cleanup Agent, due to which the old log files are not cleaned up automatically by the agent, resulting in low disk space on the Sitecore servers. 

In multiple versions of Sitecore, there is a bug in the CleanupAgent that the task executes but leaves behind so many log files. Usually, due to the rollingStyle mentioned in the Log Appender, for every 10MB, it creates log files with name ending with a suffix number like azure.log.xxxx.txt.1, azure.log.xxxx.txt.2 and so on.

Due to this bug

  • Low disk space on the Sitecore servers
  • Size of the app becomes quite huge
  • Backups will start to fail, and restore of the sites start to fail due to enormous back up size


With an easy fix, this issue can be resolved. With the below pattern, CleanupAgent will definitely pickup the log files ending with the number suffix and the logs folder will reduce to the expected size. 

<configuration xmlns:patch="http://www.sitecore.net/xmlconfig/" xmlns:role="http://www.sitecore.net/xmlconfig/role/"
   xmlns:env="http://www.sitecore.net/xmlconfig/env" xmlns:set="http://www.sitecore.net/xmlconfig/set/">
<sitecore>
<scheduling>
<agent type="Sitecore.Tasks.CleanupAgent">
<files>
<remove folder="$(dataFolder)/logs" set:pattern="*log.*.txt*" />
</files>
</agent>
</scheduling>
</sitecore>
</configuration>

Friday, August 4, 2023

Encrypt Sitecore credentials by securing credentials under App services Configuration


Encrypt Sitecore credentials by securing credentials under App services Configuration

This blog is intended to secure the connection strings of the Sitecore platform as per the recommendations from Sitecore. This is a very important step to secure the credentials, to stop them exposed to unauthorised access.  

By default, the Sitecore passwords are stored in Connectionstrings.config for the different roles. As per the recommendations from Sitecore, they should be encrypted so that passwords are not exposed without authorization. 

For the Core roles and XP Service roles, below is the method that you can use to secure the credentials of the website. 

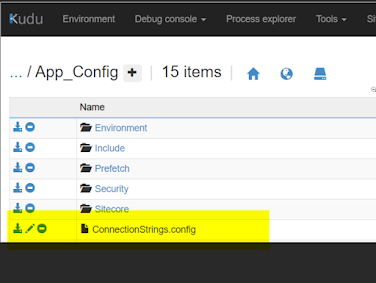
Step 1: For each of the roles, open App service Editor/Advanced Tools and navigate to the file "site/wwwroot/App_Config/ConnectionStrings.config"


Step 2: For each of the connection strings mentioned in the file ConnectionStrings.config, create a new entry under the App service -> Configuration -> scroll down to "Connection Strings" section. For example, core, web, master, security, etc. 

The name of the key will be the same as in the file. And the Value will be the complete "connectionString" value from the file. Type will be SQLAzure for the database ones. 

For other connection strings, you can set them to Custom. 


Step 3: 

Make sure you empty the connectionString value from each of the line items on the file ConnectionStrings.config. App services will fetch the connection strings from the Connection Strings section of the Configuration automatically.


And for the webjobs in the roles, xConnect Search, Cortex Processing and Marketing Operations : Below is the method to move their credentials into Configuration under App services. 

Step 1: For each of the webjobs mentioned above, open App service Editor/Advanced Tools and navigate to the file wwwroot\App_Data\jobs\continuous\xxx\App_Config where xxx is among the folders ProcessingEngine/IndexWorker/AutomationEngine depending on the webjob.


Step 2: Create an App setting by name "SITECORE_CONNECTIONSTRINGS_" as prefix followed by name from ConnectionStrings.config. Please make sure, name should be in Capital letters. 


Step 3:


Make sure you empty the connectionString value from each of the line items on the file ConnectionStrings.config. App services will fetch the connection strings from the Connection Strings section of the Configuration automatically.